Below are some excerpts from a book I am writing. Since this seems to be a matter of general interest, I decided to put this in a blog.
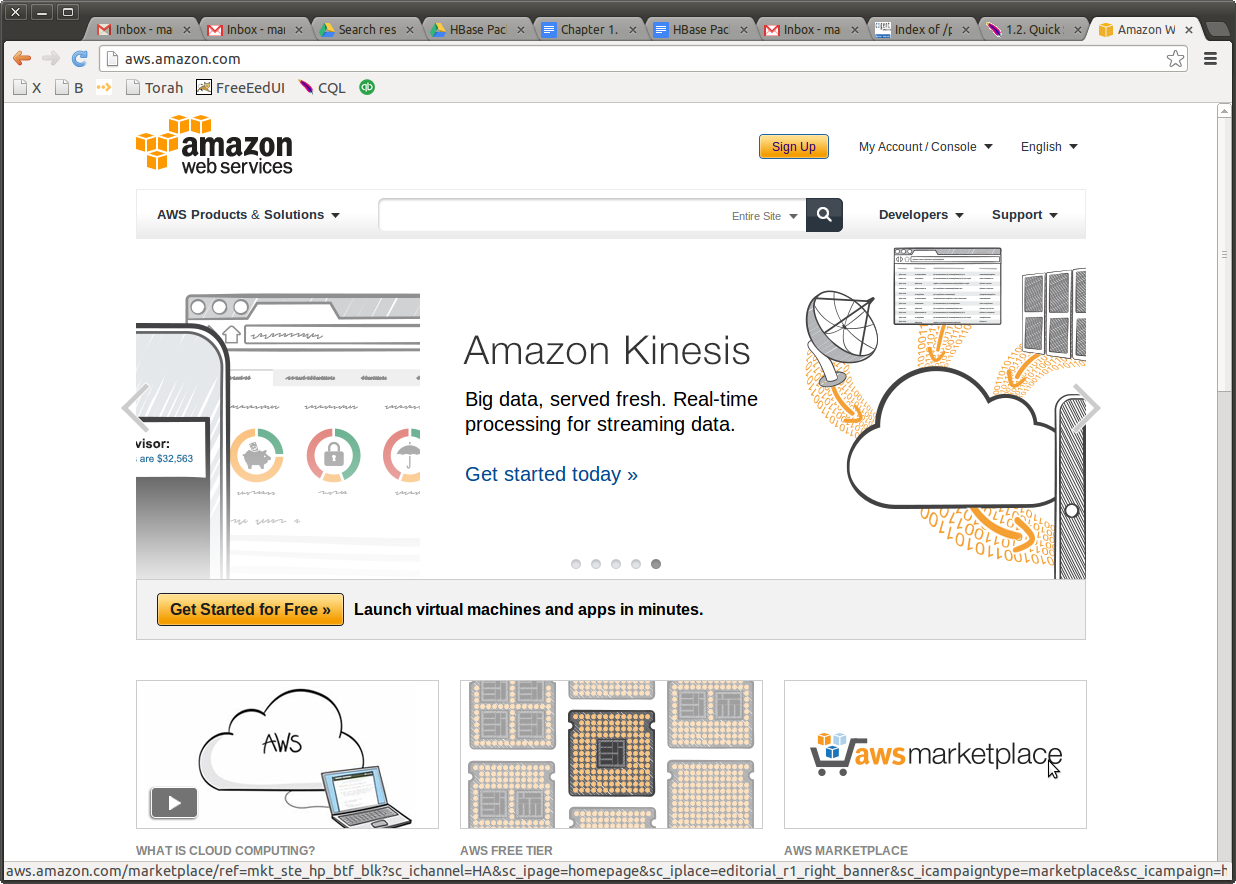
Very often people need to build a Hadoop cluster for work or for fun. There is nothing better than borrowed powerful hardware for this (provided that you don't forget to shut the cluster down when you are done, so head directly to Amazon AWS console:
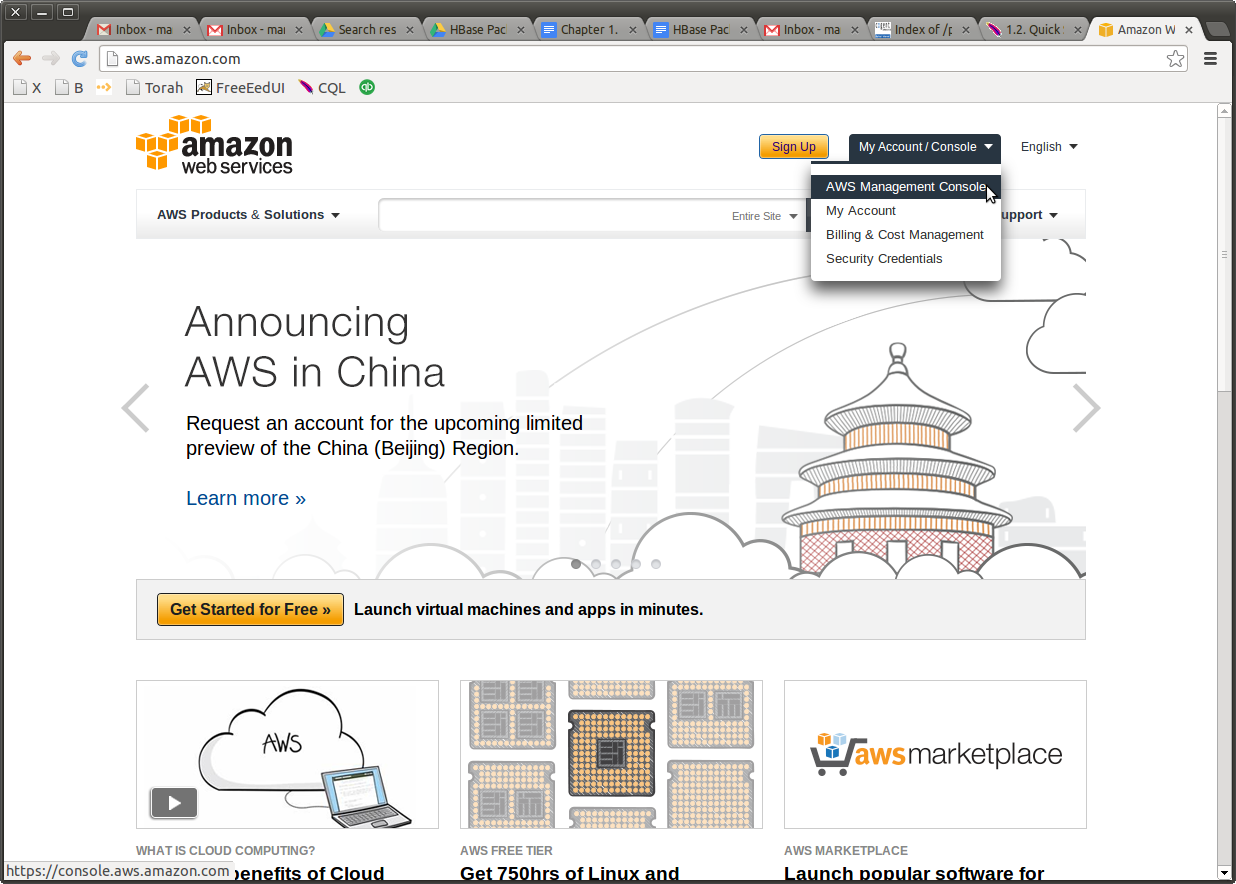
and once there, login to AWS console
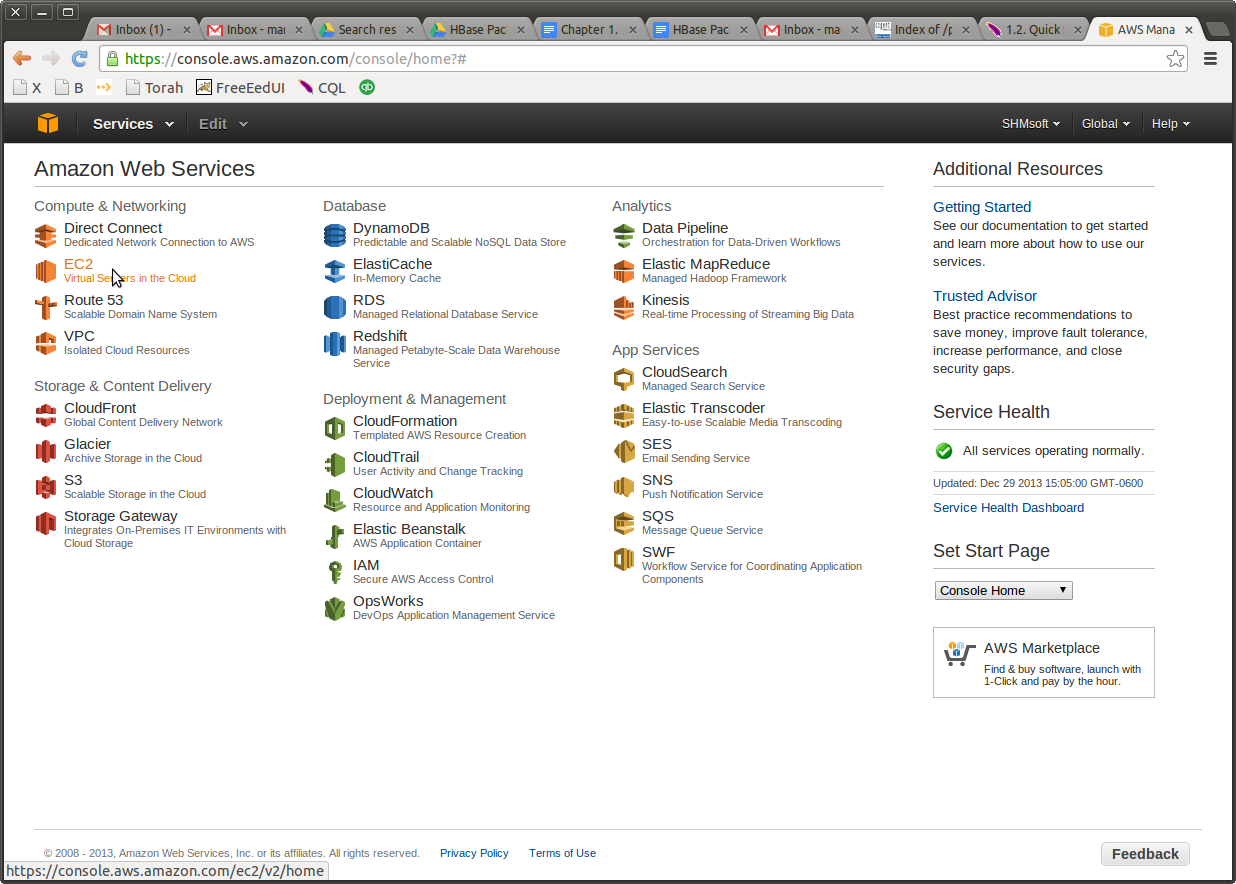
Go to EC2 services
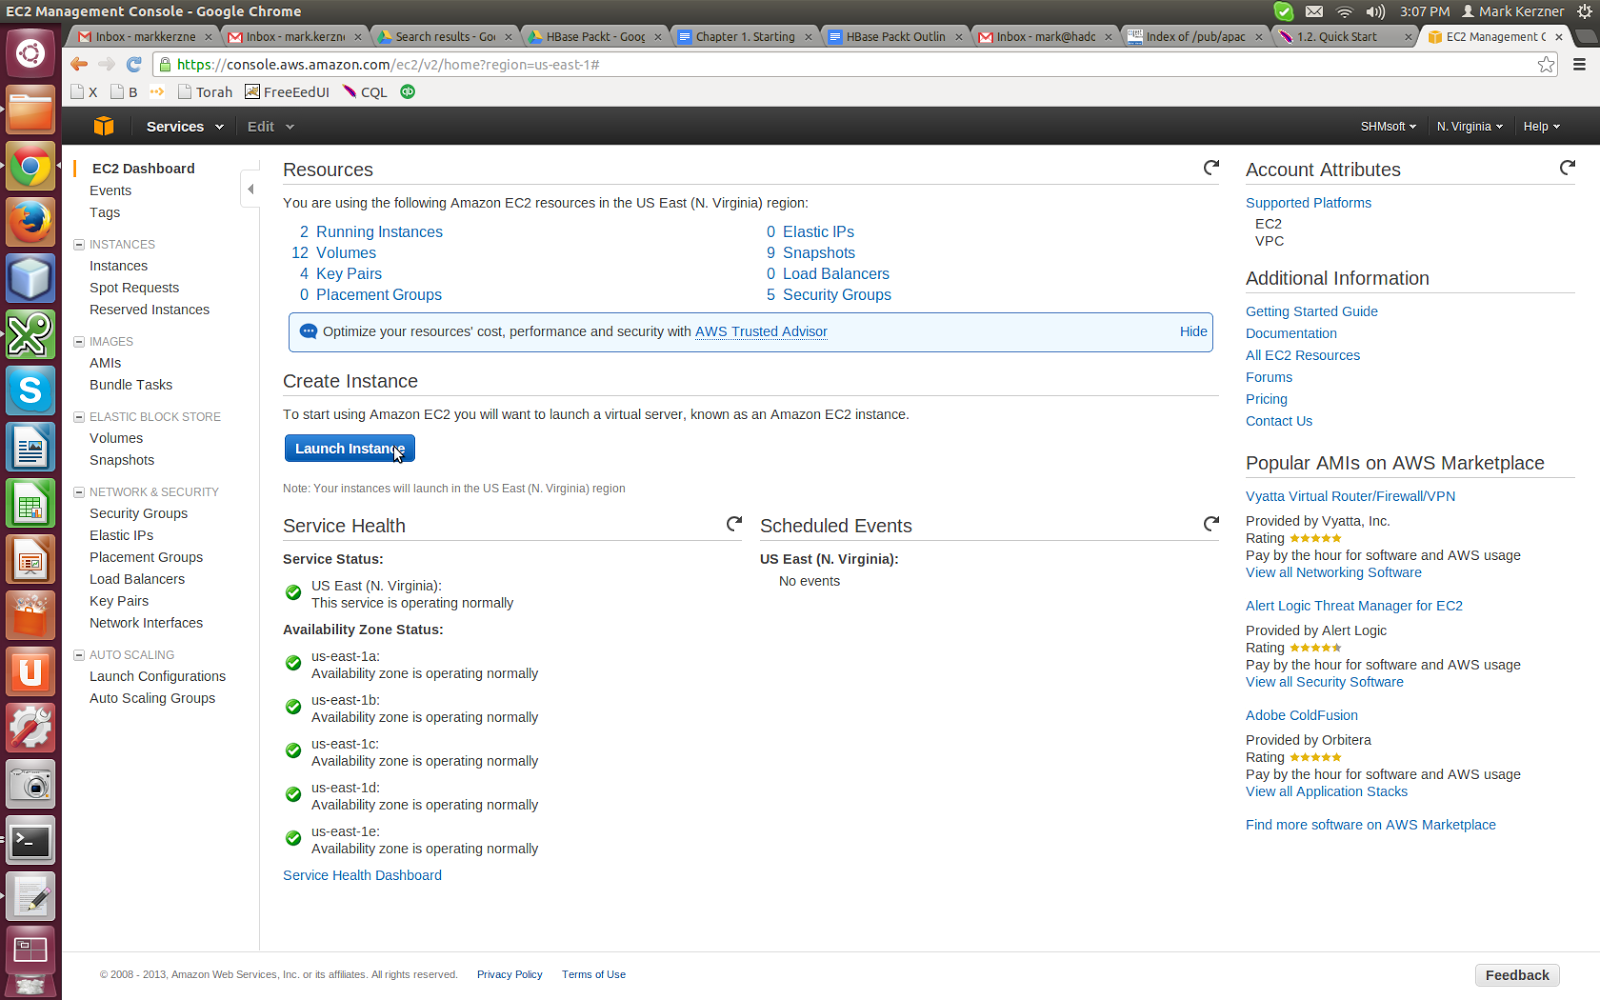
Launch your first instance
Choose Ubuntu 12.04, long term support. Why choose the relatively old version? That is because with Hadoop and HBase there is no shame in sticking to old versions. Even now, Cloudera distribution uses Java 6 by default. There is a good reason for that. The burn-in period for Hadoop is years, running on thousands of machines. So although you, as a developer, will always prefer the latest and greatest, check yourself. As the wisdom goes, “Who is strong? He who controls his own desires.”
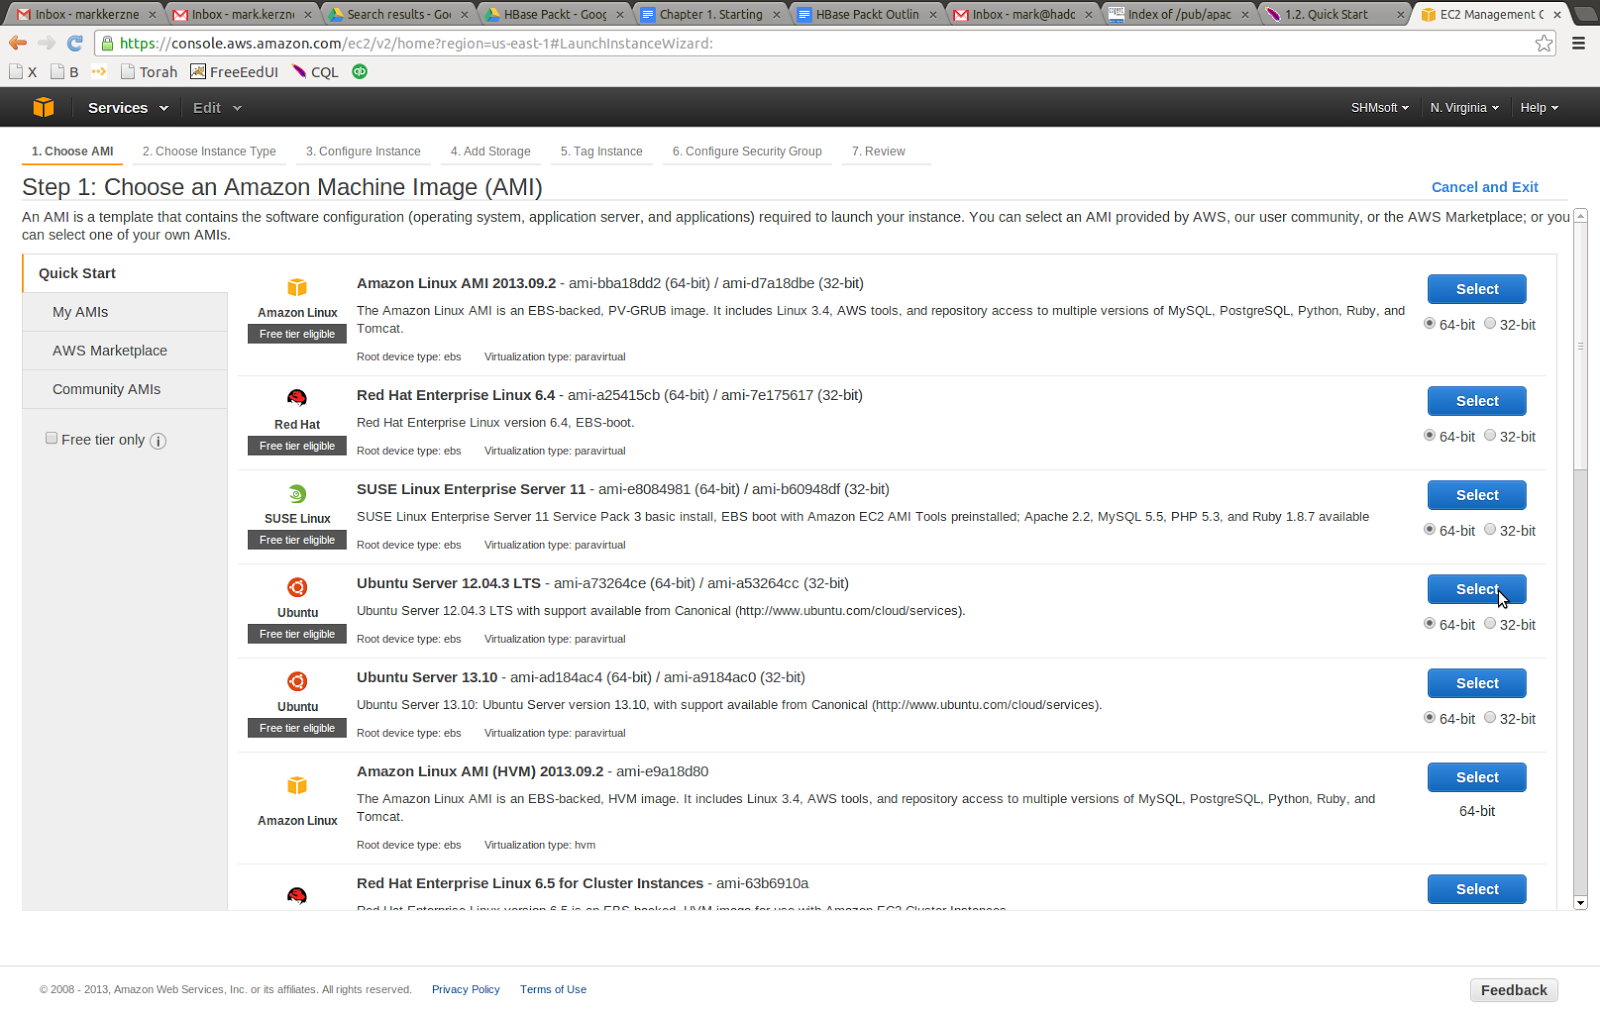
There is also a another good reason for the older version of Ubuntu server: most Hadoop testing is done on somewhat older versions of the servers. Put yourself in the Hadoop developer shoes: would you test on a long-term-support (7 years) server first, or on the latest and greatest which promises to put your data in the cloud and to connect you with every social network in the world?
That is why you will have less trouble with the older versions of the OS. I learned it the hard way.
OK, so now you are convinced and are ready to start your first instance.
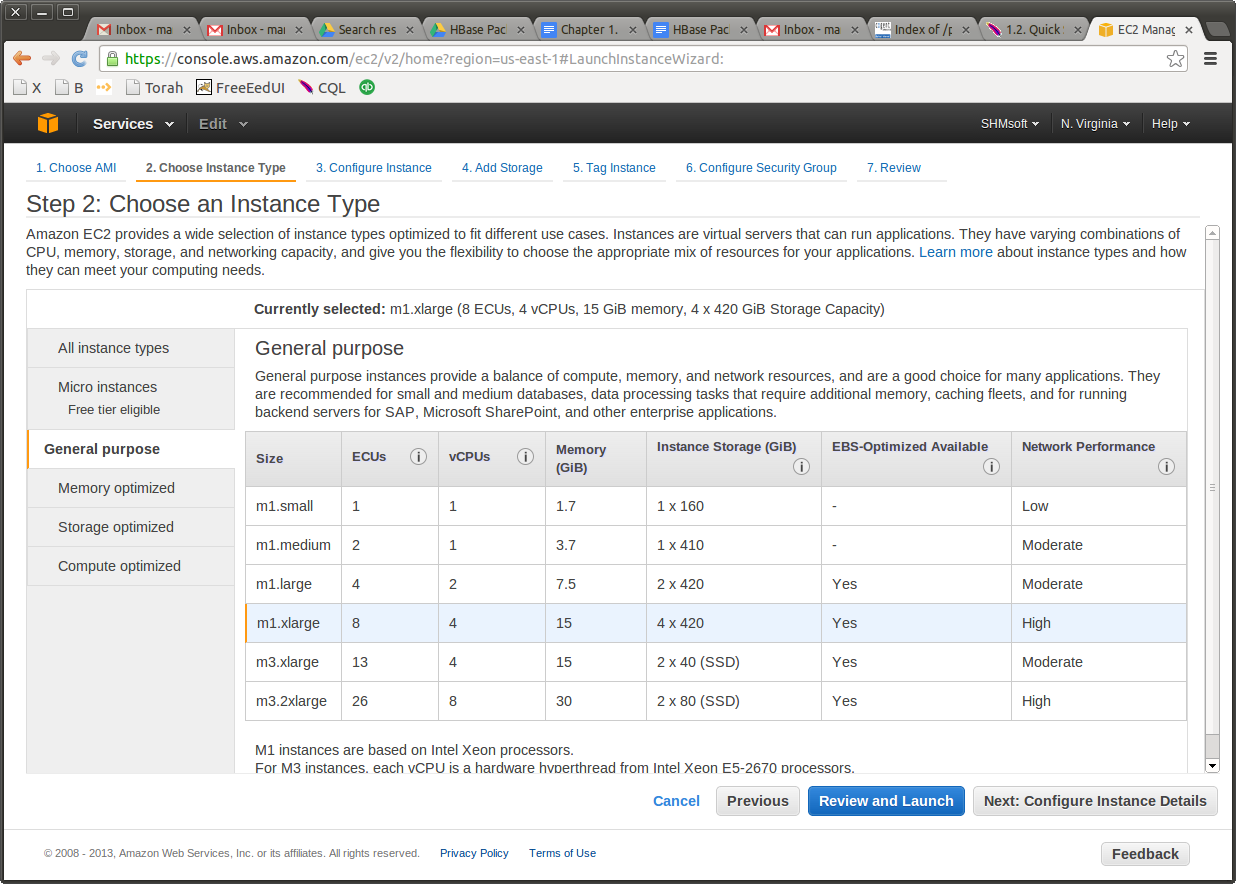
Choose m1.xlarge.
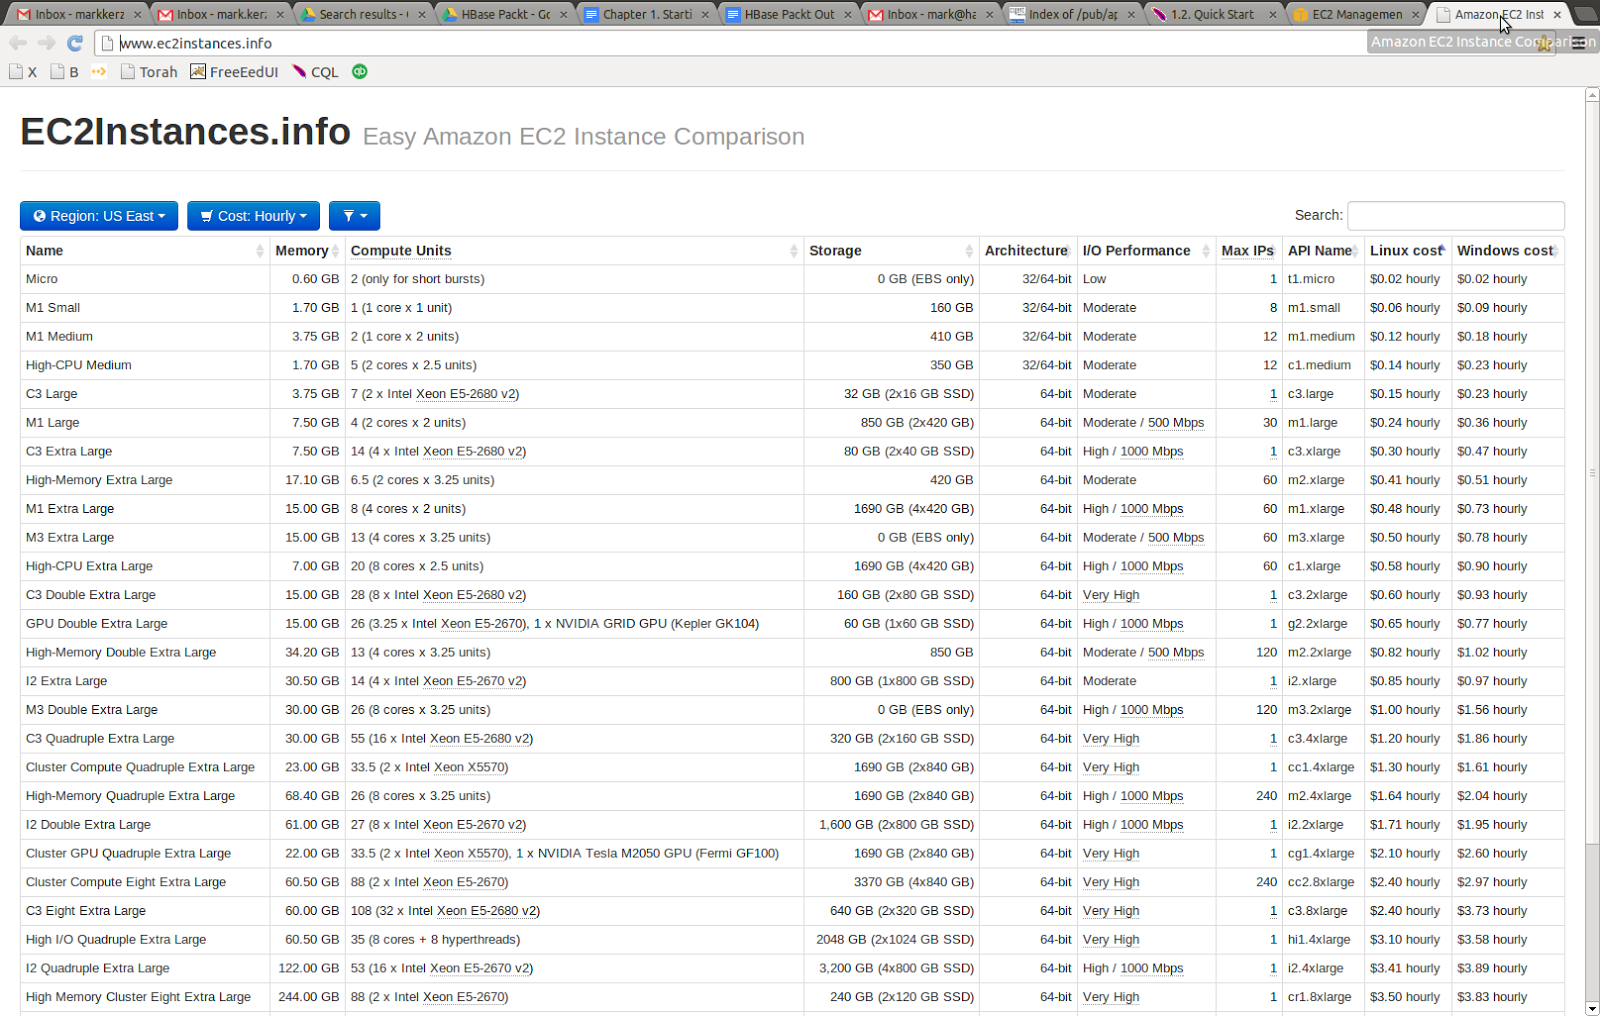
Now, you may wonder, how much is this going to cost you? First of all, let me give you a convenient table that summarizes AWS costs. Without it, you would have to browse the Amazon services for quite a while. Here is the link http://www.ec2instances.info/, and here is what you see there. Quite useful.
Secondly, in the words of a well-known Houston personality, called Mac, or the Mattress Mac, “I am going to save you money!” (http://tinyurl.com/kf5vhcg) Do you not click on the “Start the instance” just yet.
In addition to on-demand instance, Amazon features what is called “spot instances.” These are machine hours traded on the market, often at 1/10 the price. So, when you are ready to launch your instances, click on “Request spot instances,” just as I have done in the screenshot below.
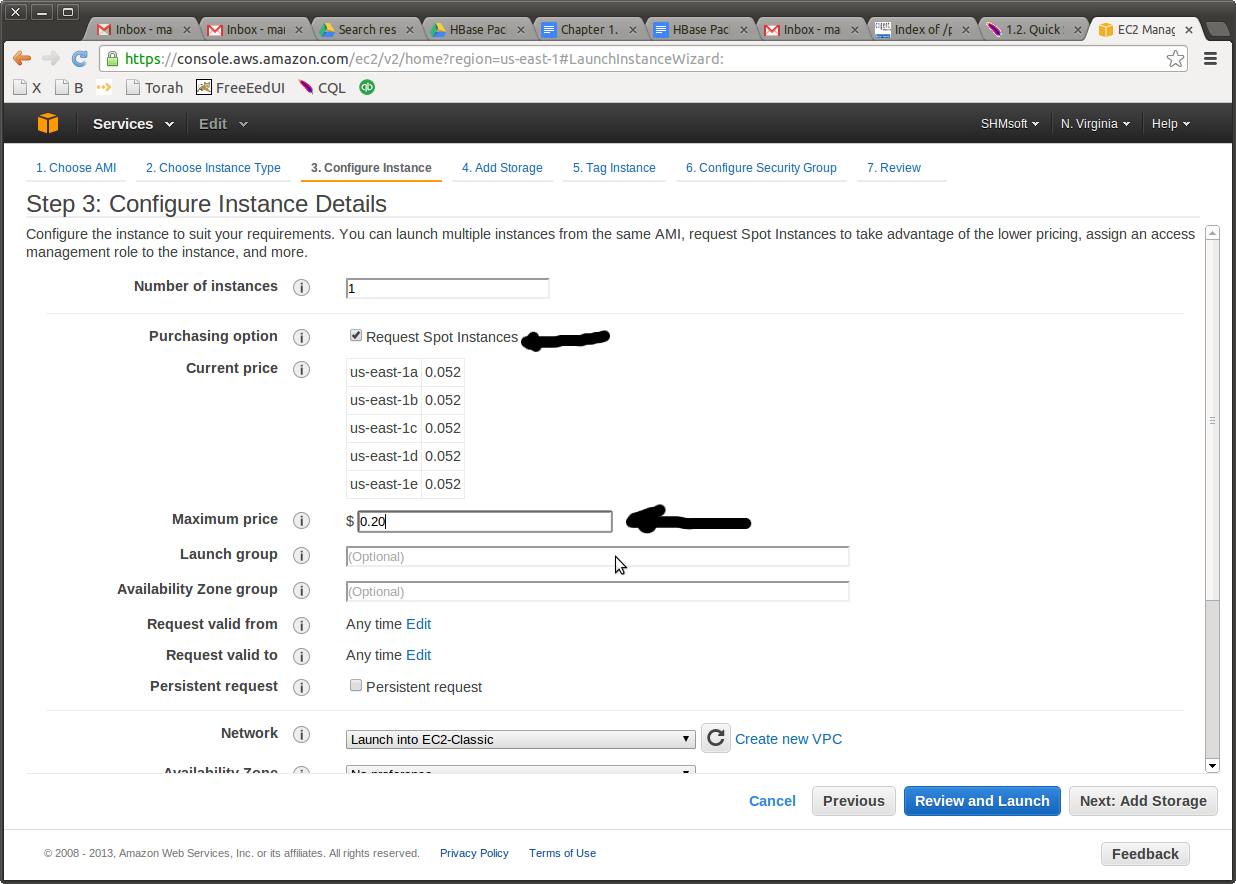
Here are my savings: m1.xlarge cost 48 cents an hour when purchased on demand, but its current market price is about 5 cents, or about 10 times cheaper. I am setting the maximum offered price at 20 cents, and that means that I will be paying the fluctuating market price, starting from 5 cents and possibly up, but not more than 20 cents per hour.
I do not delude myself: I know that big fish (that it, big EC2-based companies) are hunting for those savings, and they apply sophisticated trading techniques, which sometimes result in strange pricing exceeding the on demand pricing. Be careful with the max limit you set. But for our limited purposes of practicing the cluster construction, we should swim under the belly of the big fish and be just fine.
The next step is selecting the storage. The Ubuntu image comes with 8 GB of root drive, and that is too little for anything. Choose 30 GB for now. Remember that each 1 GB costs 15 cents per month at current prices, so for hours and even days that is negligible.

By now, you might be asking yourself, where does Mark know all this from? I will give you the two references now, and I will also repeat them at the end of the chapter, for the benefit of those souls who like to peek at the end. As I have already told you, I run Hadoop/HBase training, and our labs are all open source. Please look here, https://github.com/hadoop-illuminated/HI-labs. More specifically, in the Admin labs, in the “Managers” section (and that means Hadoop, not human managers), you will find the instruction in brief, https://github.com/hadoop-illuminated/HI-labs/tree/master/hadoop-admin/managers/cloudera-cm. In turn, it refers to the Cloudera blog post found here, http://blog.cloudera.com/blog/2013/03/how-to-create-a-cdh-cluster-on-amazon-ec2-via-cloudera-manager/. However, neither is as complete as this chapter, so save it for future use :).
Now is time to set up a security group. Here is my “hadoop” security group. Please note that all servers within this group can communicate with each other on every port. For the outside ports, I have opened those that are required by the Cloudera Manager (CM) and by the Hadoop UI for HDFS and for MapReduce. Here is me selecting this group for Cloudera Manager I will be using to install the rest of the cluster.
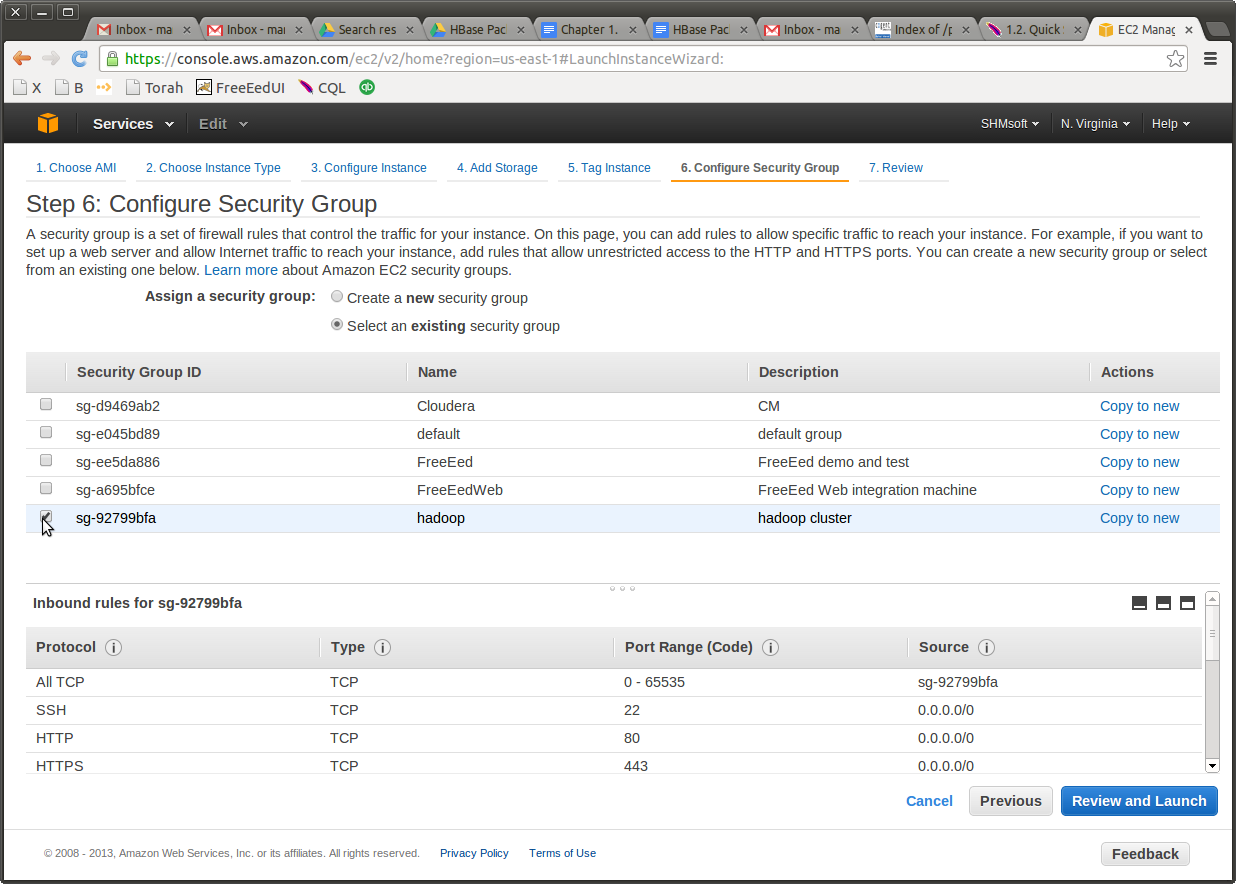
And here is my “hadoop” security group

I don’t let the Cloudera Manager (CM) create a group for me - it is better to create it myself and keep using it.
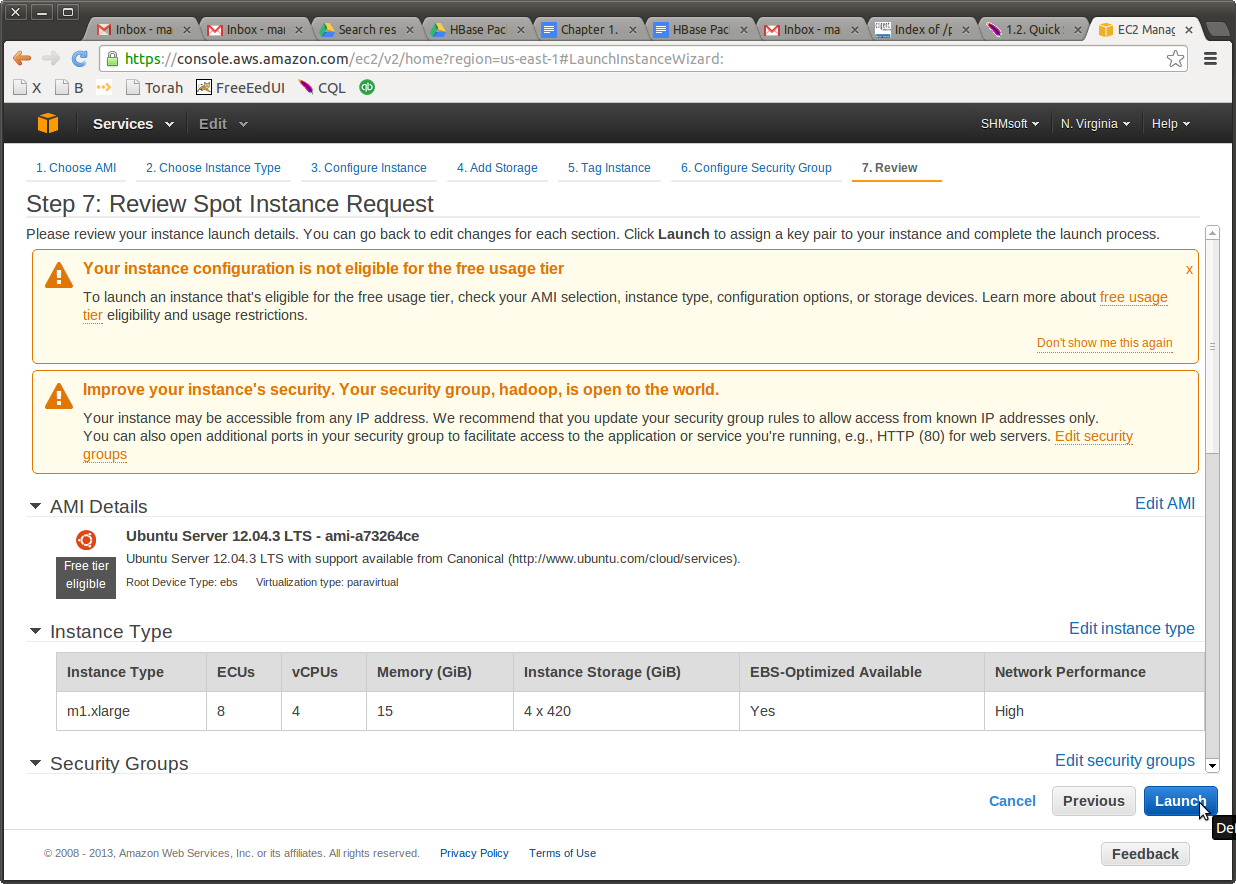
Final touch: starting the CM instance.
Choose the key. Again, don’t let CM create those keys for you. Ask Amazon, and store the key in a secure place.

Hold on, we are almost done. Now let us start 10 more instances which will be used for the cluster construction. There are two reasons why I start them myself rather than asking CM to start them for me. Firstly, it is savings. I will start spot instances, whereas CM can only start on-demand ones. Secondly, it’s better control. If something does not work, I can see it much better than the CM will.
You are familiar by now with most of the stops. Except that this time I am starting 10 instances at once. Saving a lot of money in the process.
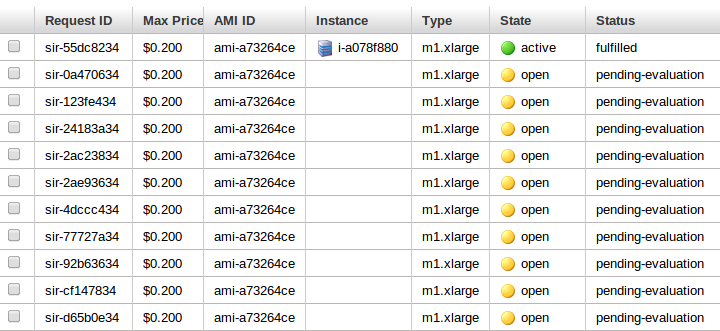
These ten will be the workhorses of the cluster, so I will give them enough root space, 100 GB. The CM is smart enough to get the ephemeral storage (about .5TB) and make it part of the HDFS. The result will be about 5 TB cluster for $1/hour. Here are all of these requests pending
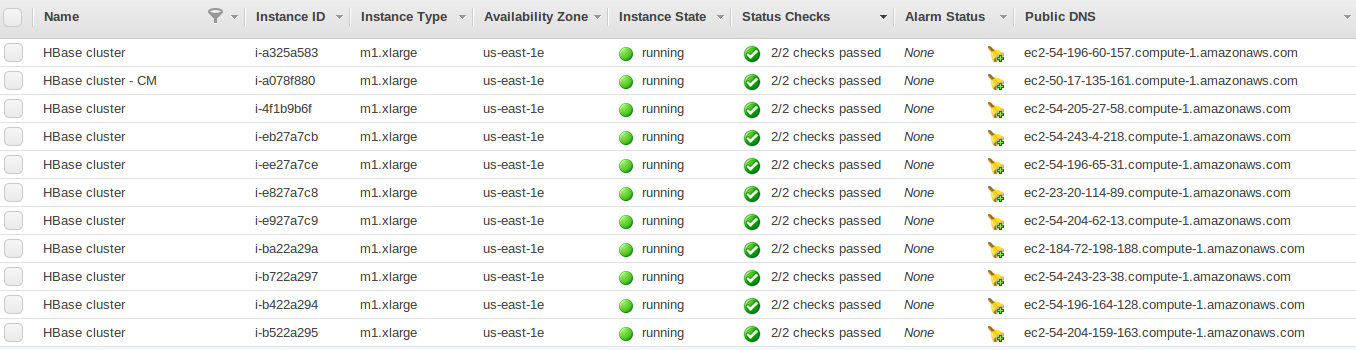
and a few minutes later, here they all are again, spot requests fulfilled and servers running.
Now comes your part - building the cluster. Remember, so far Amazon was working for you, you just provided the right foundation. Follow the instructions in the Hadoop Illuminated lab.
Login to the CM machine:
ssh -i .ssh/ ubuntu@
The key is what you saved when EC2 created the key pair for you, and the is the URL of the server where you run the Cloudera Manager. Note that I carefully assign the servers their names. Soon you will have many servers running, and if you don’t mark them, it will get confusing. Now start the install:
wget http://archive.cloudera.com/cm4/installer/latest/cloudera-manager-installer.bin
chmod +x cloudera-manager-installer.bin
sudo ./cloudera-manager-installer.bin
chmod +x cloudera-manager-installer.bin
sudo ./cloudera-manager-installer.bin
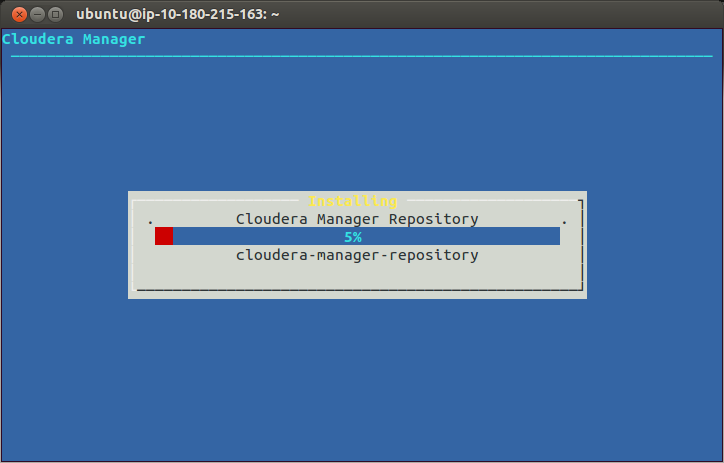
CM will take you through a series of screenshots, and you will have to accept a couple licenses. There are no choices and no gotchas here, so I am showing only one intermediate screen.
After it is done, give it a minute to start the web server, then go to the :7180. In my case, this looks as follows 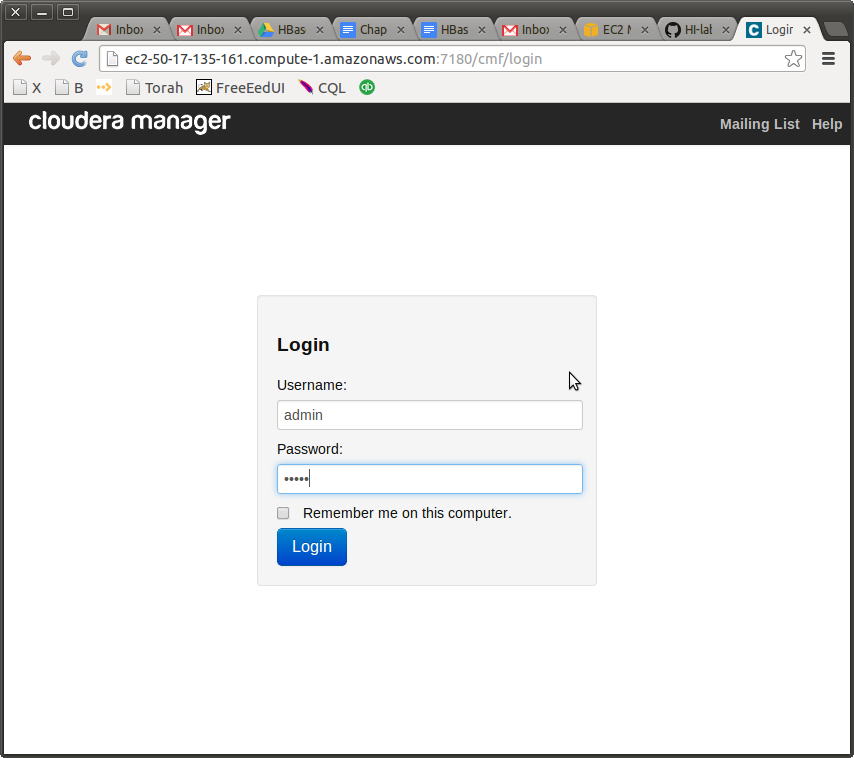
Login with admin/admin. Accept the free license, continue to the “Hosts” screen. And now, probably the most important selection. Get the Private DNS for every host in the cluster and put it into the Check Hosts window.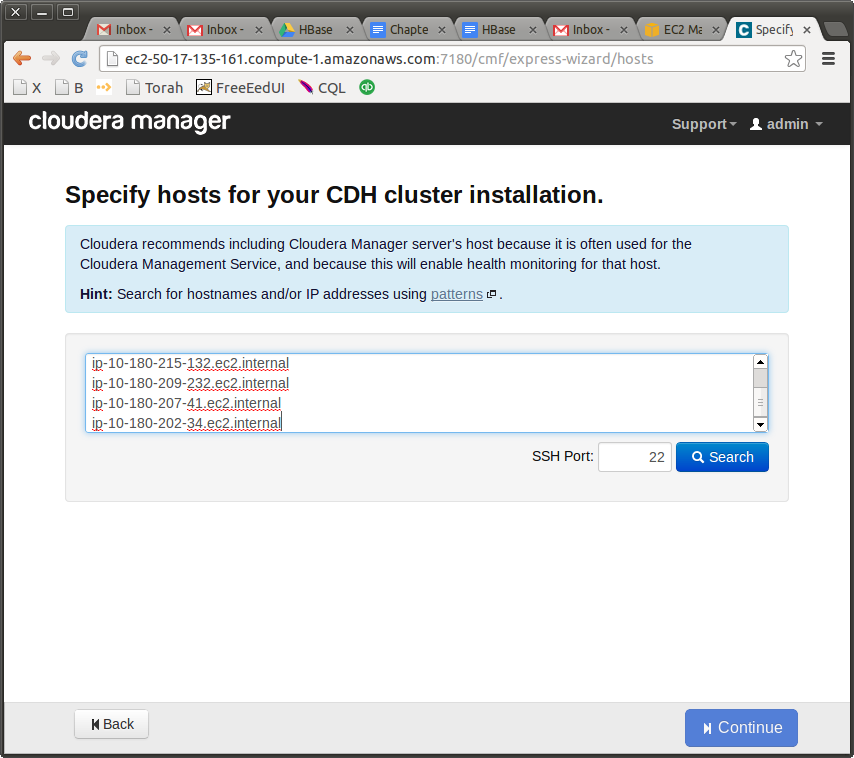
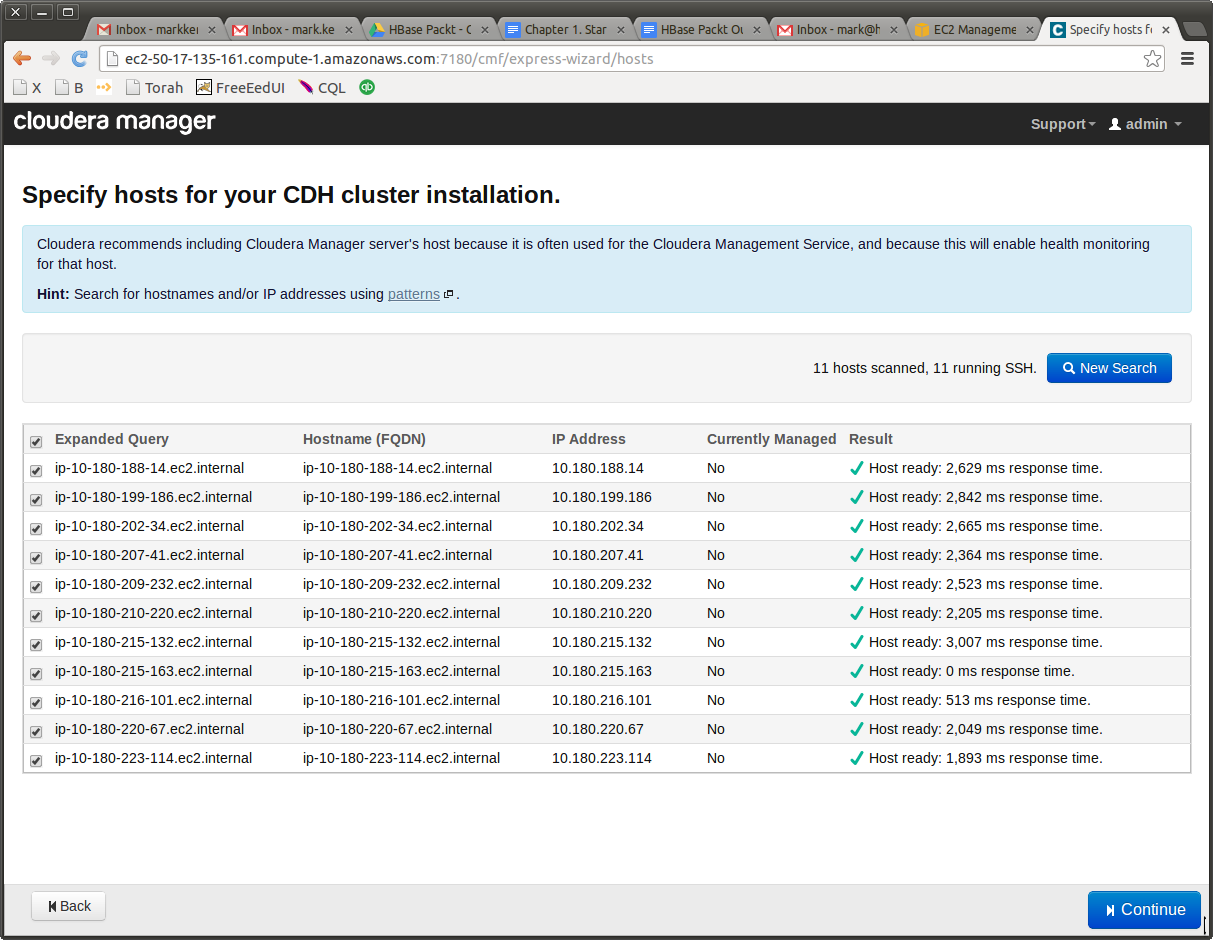
The last note, and I will let you kids go and play with your cluster and fly solo. Why is it so important to choose the internal IP, also called “Private DNS”? Firstly, because you won’t be charged for every request. Normally, you do get charged for every request and transfer, but for internal transfers this charge is 0, free. nada! Secondly, recall that in our security group all servers are allowed to communicate with all other servers on all ports. So you won’t have any problems setting up your clusters, regardless on which ports the Hadoop services decide to communicate. If you don’t do that, the install will fail on the next step. But, if everything is correct, you will get this happy screen.
Give it the right user name (ubuntu) and the right key on the next screen. I can rely on you to do it right, since these are the same user name and key that you used to login to the Cloudera Manager server. If you could do this, you will be able to do that.
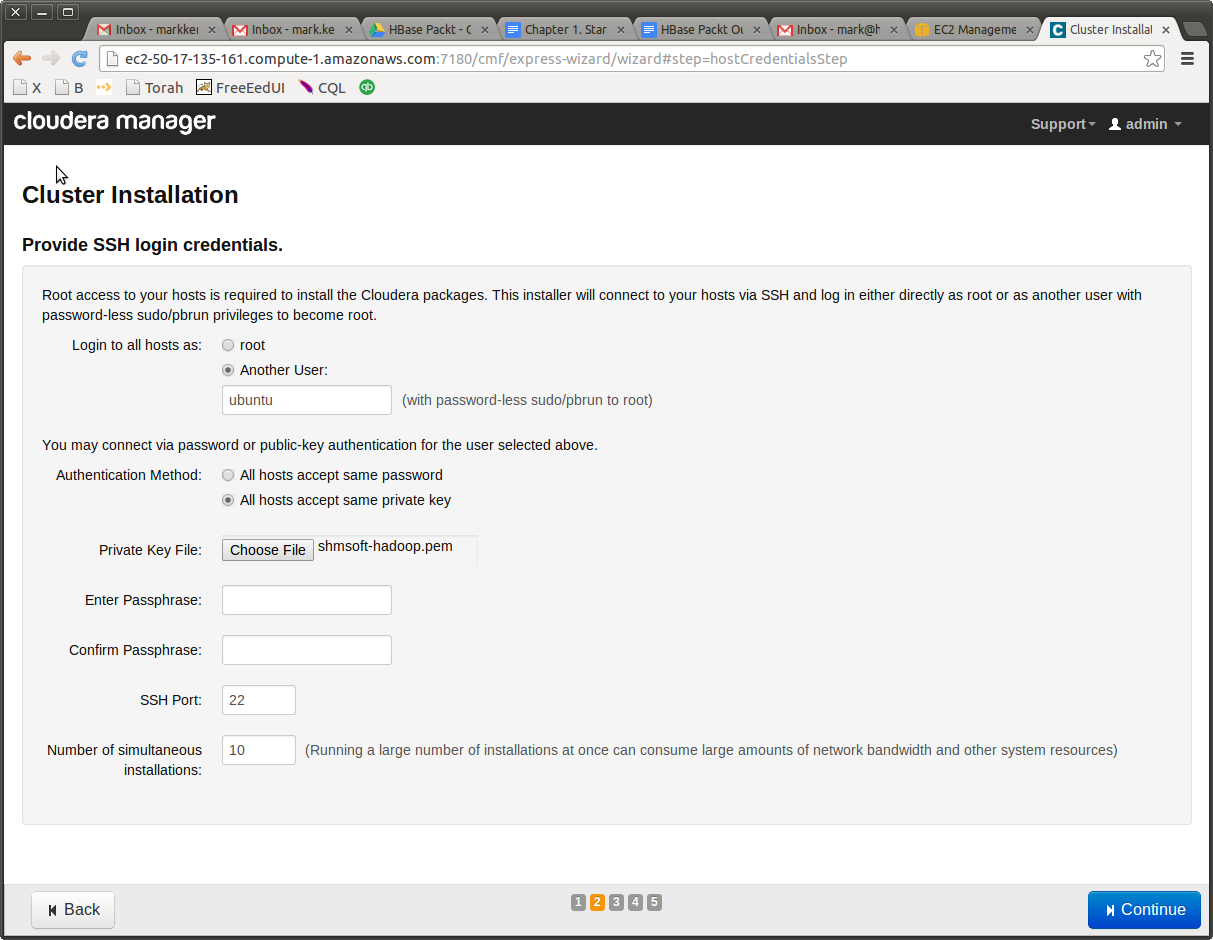
From this point on, don’t leave your monitor unattended. Keep clicking at the right times. If you don’t, CM session will time out, and you won’t be able to restart the install. All the work will be lost; you will have to shut all servers down and restart. You’ve been warned. Get your coffee ready from before.
It is not uncommon for some servers to fail to start. This is normal in clusters and in networked environment. CM will drop the servers that it fails to start for any reason, and continue with what it has. As a wise man said, “Who is rich? - One who is happy with what he has.”
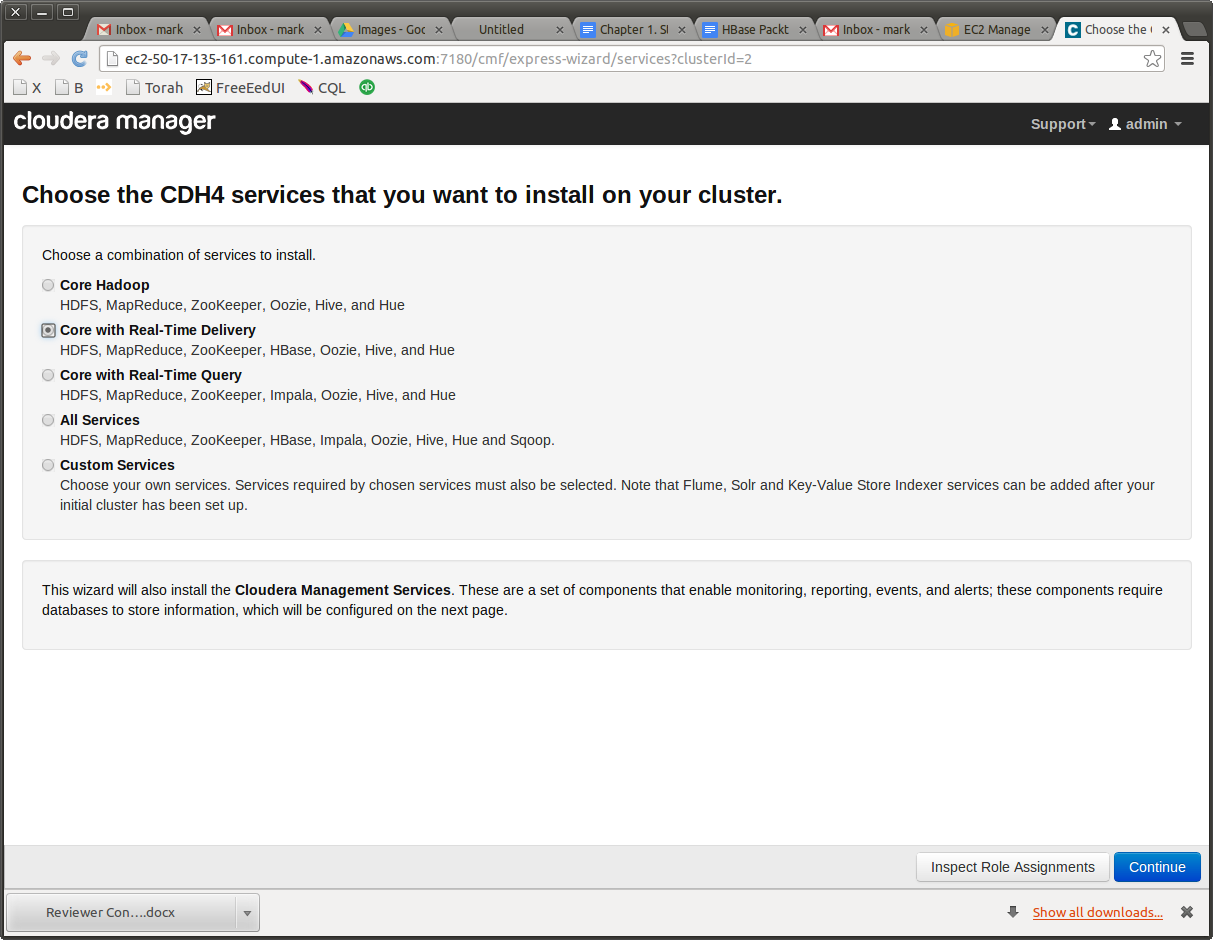
On one of the next screens, do not forget to request HBase, as part of “real-time delivery”. There is no deep meaning to this, just marketing, since it will be you who will provide the actual real time delivery with HBase and your code.
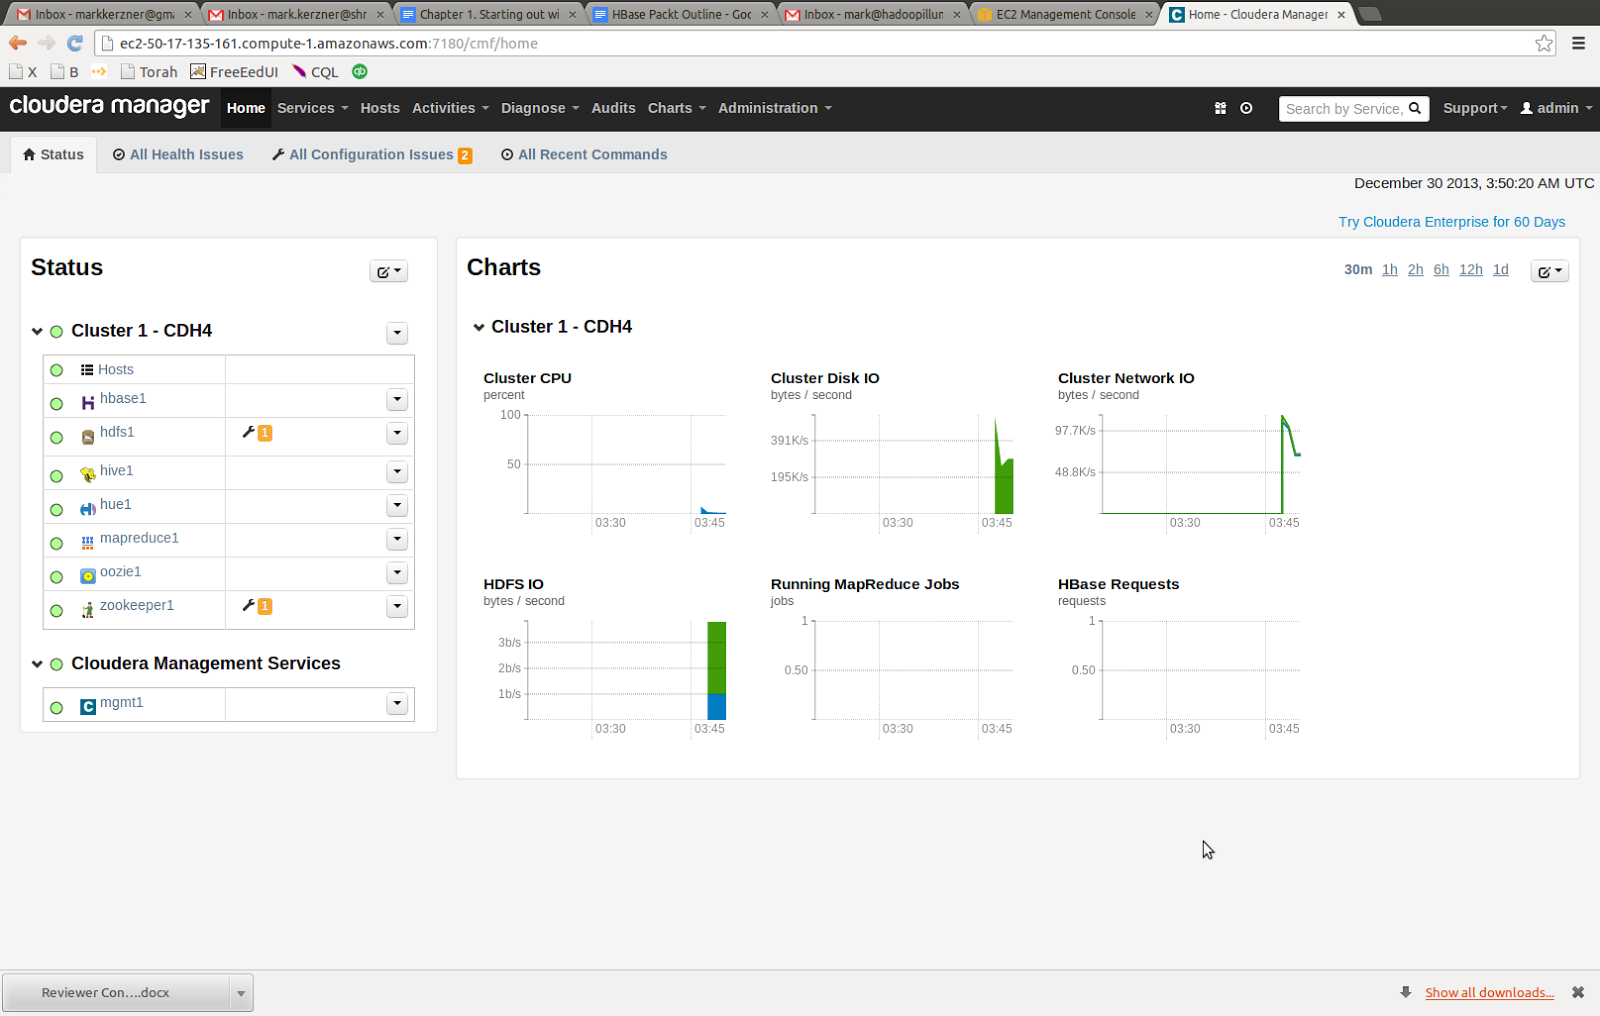
Finally, enjoy your new cluster, kick the tires, look around, try to look at every service that is installed, analyze each individual host, etc. You can always come back home by clicking on the “Home” or “Cloudera” button at the top left.
Login into the cluster. Any of the 11 servers, including the CM, is good for that, because the Edge Services are installed on every one of them. In my case, the login command looks like this
mark@mark-dev:~$ ssh -i .ssh/shmsoft-hadoop.pem ubuntu@ec2-50-17-135-161.compute-1.amazonaws.com
Once there, I can look around HDFS:
ubuntu@ip-10-180-215-163:~$ hdfs dfs -ls /
Found 3 items
drwxr-xr-x - hbase hbase 0 2013-12-30 03:41 /hbase
drwxrwxrwt - hdfs supergroup 0 2013-12-30 03:45 /tmp
drwxr-xr-x - hdfs supergroup 0 2013-12-30 03:43 /user
However, if you try to create your home directory, it won’t work
hdfs dfs -mkdir /user/ubuntu
mkdir: Permission denied: user=ubuntu, access=WRITE, inode="/user":hdfs:supergroup:drwxr-xr-x
To fix this, you need to do the following (as described here, https://github.com/hadoop-illuminated/HI-labs/tree/master/hadoop-admin/managers/cloudera-cm):
ubuntu@ip-10-180-215-163:~$ sudo -u hdfs hdfs dfs -mkdir /user/ubuntu
ubuntu@ip-10-180-215-163:~$ sudo -u hdfs hdfs dfs -chown ubuntu /user/ubuntu
ubuntu@ip-10-180-215-163:~$ hdfs dfs -mkdir /user/ubuntu/mark
Now you have your home, and in fact your user dir (“mark” in my case), so that I can see it
ubuntu@ip-10-180-215-163:~$ hdfs dfs -ls
Found 1 items
drwxr-xr-x - ubuntu supergroup 0 2013-12-30 04:03 mark
Moreover, I can even put files there. For example, I can put my install file in mark/
hdfs dfs -put cloudera-manager-installer.bin mark/
And lo and behold, I can see that file
hdfs dfs -ls mark
Found 1 items
-rw-r--r-- 3 ubuntu supergroup 501703 2013-12-30 04:04 mark/cloudera-manager-installer.bin
Two last tricks of the trade. To view the HDFS UI, open it in the browser or on the command line
If you use the internal IP (which you can find on the AWS console), as follows
then you will not be blocked by the firewall and will be able to browse to any level.
HBase? - Why, it is right here!
Any questions? Use the Hadoop Illuminated forum found here, http://hadoopilluminated.com/, to ask the author or your peers.
Conclusion
In this chapter I convinced you that you need to be able to build your own HBase clusters, and then spent the large part of the chapter walking you through this process. Please follow the steps above precisely! Many hints that are found here are very important, and without them the cluster will not work.
Once you are at ease with the basic construction, you will be able to strike on your own, change the ways you build those clusters and eventually come up with something new and unexpected.
Please keep in mind that we used the Cloudera Hadoop distribution as a basis for all instructions. You are not limited to this, you have a choice. Apache BigTop project is your independent alternative: http://bigtop.apache.org/. HortonWorks and MapR also offer their distributions with their Managers. All of them provide the same excellent Hadoop distribution. In this book, I wanted to give you a clear set of instructions that worked for me. However, if you are interested in the precise instructions for other distributions, watch for our Hadoop Illuminated Labs, https://github.com/hadoop-illuminated/HI-labs. Eventually all distributions will be described there, in the Admin labs.
Note that there are exactly 32 screenshots in this chapter. This, of course, is no coincidence. Recall the poem by Omar Khayyám, which tells you that there are no coincidences in this world.
“The Moving Finger writes; and, having writ,
Moves on: nor all thy Piety nor Wit
Shall lure it back to cancel half a Line,
Nor all thy Tears wash out a Word of it.”
One can argue whether tears can or cannot erase our mistakes, but in this world of clusters we can always try by repeating the steps again and again.
No comments:
Post a Comment